Flowable实战篇
lecture:波波老师
Flowable整合SpringBoot
添加相关依赖
1
2
3
4
5
6
7
8
9
10
11
12
13
14
15
16
17
18
19
20
21
| <dependency>
<groupId>org.flowable</groupId>
<artifactId>flowable-spring-boot-starter</artifactId>
<version>6.6.0</version>
</dependency>
<dependency>
<groupId>com.alibaba</groupId>
<artifactId>druid</artifactId>
<version>1.1.14</version>
</dependency>
<dependency>
<groupId>mysql</groupId>
<artifactId>mysql-connector-java</artifactId>
<version>8.0.21</version>
</dependency>
<dependency>
<groupId>junit</groupId>
<artifactId>junit</artifactId>
<version>4.13.2</version>
<scope>test</scope>
</dependency>
|
添加对应的配置
1
2
3
4
5
6
7
8
9
10
11
12
13
14
15
16
17
18
19
20
21
22
| spring:
datasource:
type: com.alibaba.druid.pool.DruidDataSource
driver-class-name: com.mysql.cj.jdbc.Driver
url: jdbc:mysql://localhost:3306/flowable1?serverTimezone=UTC&nullCatalogMeansCurrent=true
username: root
password: 123456
hikari:
minimum-idle: 5
idle-timeout: 600000
maximum-pool-size: 10
auto-commit: true
pool-name: MyHikariCP
max-lifetime: 1800000
connection-timeout: 30000
connection-test-query: SELECT 1
flowable:
async-executor-activate: false
database-schema-update: true
server:
port: 8082
|
系统启动的时候检查如果数据库对应的表结构没有创建,会帮助我们先创建对应的表结构
案例应用
流程部署
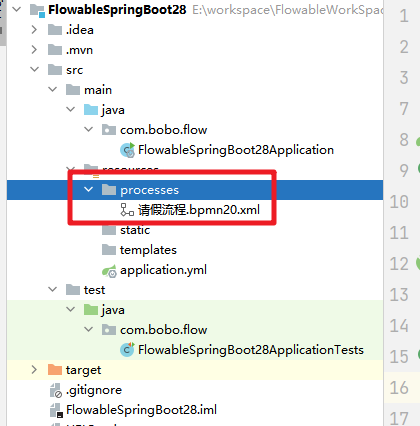
- processes目录下的任何BPMN 2.0流程定义都会被自动部署。创建processes目录,并在其中创建示例流程定义(命名为one-task-process.bpmn20.xml)。
- cases目录下的任何CMMN 1.1事例都会被自动部署。
- forms目录下的任何Form定义都会被自动部署。

通过手动方式来部署
1
2
3
4
5
6
7
8
9
10
11
12
13
14
15
16
17
18
19
20
21
22
23
24
25
26
27
28
29
30
31
32
33
34
| @SpringBootTest
class FlowableSpringBoot28ApplicationTests {
@Autowired
private ProcessEngine processEngine;
@Autowired
private RepositoryService repositoryService;
@Autowired
private TaskService taskService;
@Autowired
private RuntimeService runtimeService;
@Test
void testDeploy() {
Deployment deploy = repositoryService.createDeployment()
.addClasspathResource("请假流程.bpmn20.xml")
.name("holiday")
.deploy();
System.out.println("deploy.getId() = " + deploy.getId());
System.out.println("deploy.getName() = " + deploy.getName());
}
}
|
启动流程
启动流程和前面介绍的就没什么差异了,通过RuntimeService来实现
1
2
3
4
5
6
7
8
9
10
|
@Test
void startFlow(){
Map<String,Object> map = new HashMap();
map.put("assignee0","zhangsan");
map.put("assignee1","zhangsan");
runtimeService.startProcessInstanceById("holiday28:2:3653a34e-ae45-11ec-969d-c03c59ad2248",map);
}
|
处理流程
处理流程和前面介绍的也一样,通过TaskService来处理
1
2
3
4
5
6
7
8
9
10
11
12
13
14
|
@Test
void completeTask(){
Task task = taskService.createTaskQuery()
.processInstanceId("fb166cd8-ae45-11ec-92c4-c03c59ad2248")
.taskAssignee("zhangsan")
.singleResult();
if(task != null){
taskService.complete(task.getId());
System.out.println("complete ....");
}
}
|